Showing posts with label cartoon. Show all posts

Thursday, January 03, 2013

How to Use Chroma Key in Vegas Movie Studio

For some reason, this short tutorial took days to complete!  That would be the reason you don't see many like it on my channel.  Still, I enjoy doing these kinds of videos and plan to do more in the future.

The tutorial shows how to use the chroma keyer plugin found in Vegas Movie Studio HD Platinum 10.0.  At least, the way I use it.  Ha!

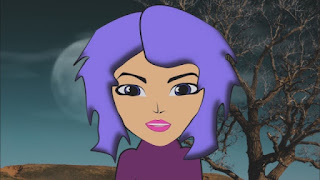
I don't have a chroma green backdrop, so I decided to create a simple animation and give it a green background.  Sort of a green screen simulation.
Green screen animation example.  ©shaunachan

 I created the animation using Anime Studio Pro, which is a whole different tutorial in itself.  Yep, I've already made a tutorial for that one.

Here's the link to a 3-part series I did explaining switch layers, and whatnot, in Anime Studio Pro 6:
Switch Layer Tutorial

Okay, moving on to chroma keying.

Here's what it looks like after chroma keying.
Example of chroma keyed images.  ©shaunachan


This image contains 4 layers.  The girl animation, a photo of a tree, some clouds and a photo of the moon.  In that order.  The chroma key plugin was applied to the girl animation background, and then to the sky in the tree photo.  I could have used video in the layers instead of photos if I wanted.  Which would be pretty cool, too!  There are so many options.  I did manage to animate the moon using track motion.

My face in the sky was cut out with the Cookie Cutter plugin.  I changed the border of it to blue and chroma keyed that, too.  I was told the result was creepy ... not nearly as creepy as the junk that would have shown up in the background.  Haha!  Oh, the possibilities!
  

One thing to note, when applying any type of effect to media in Vegas, one needs to understand which option to choose between Media FX and Video Event FX.  My understanding is that selecting Media FX applies the chosen effect to the clip in every instance in which it appears, including in the Project Media bin.  If Video Event FX is chosen, only in that instance is the desired effect applied.  So, using Media FX  helps to save time if the media will be used repeatedly throughout the entire work.

I tried to keep the tutorial as simple as possible.  But, of course, there are a few slightly more complex elements I threw in toward the end.  I briefly brush over how to animate the moon, but didn't go into detail.  I may need to make another tutorial!

Until next time~~


Tuesday, January 31, 2012

Simple Head Turn Animation Using Anime Studio Pro 6


In keeping with the whole tutorial theme of late, I thought I'd put together this truly simple little head turn animation.

Now, I'm not the best artist in the world, so a 2d character turning its head is a little tricky for me. There are several ways to animate the movement. The one I'm using is a switch layer technique.

All one need do is make a few different drawings of a character's pose. The layers the drawings are in are then dragged into a switch layer. That's where the magic happens. The switch layer. (*.-)

By advancing the timeline, and selecting different images in the switch layer along the way, the character comes alive.

It's good to have this stuff documented. I have a tendency to forget how to use some of my favorite software. Maybe these tutorials will keep me focused! Ha!

Saturday, January 21, 2012

Bones Layer Test- Anime Studio Pro 6

Recently, I revisited some old software that had been languishing on my laptop, Anime Studio Pro 6.

Now, I love this software, it's by far one of my favorite software purchases. But, I just haven't had much time to experiment with it. Still, every now and again, I revisit it and sort of re-learn it. Haha! I have to, since I can't retain the knowledge, for some reason. (O.o)

My latest lesson to myself has been using the bone layer function. With the bone layer, you can place a "skeleton" of sorts over an image you've drawn. Then by binding certain points in the drawing to the bones, you can animate the thing.

Pretty cool, huh?

I couldn't wait to give it a go, so I hurriedly scratched together a pic or two, admittedly they are out-of-proportion humanoids, but still. Then, I created a bone layer and drag a pic into it. I put some bones in there, and bound them up to parts of the picture using the "bind points" feature.

Here's the result of my quick work:


I particularly liked the light dancer in this one. I think I'll do a little more with that idea a bit later. The music was fun, too. The music, by Kevin MacLeod of incompetech.com, is called, "Cut and Run". He's got loads of nice stuff.

This little lesson seems ripe for a tutorial, so I'd better get busy making one.
(^.^)d